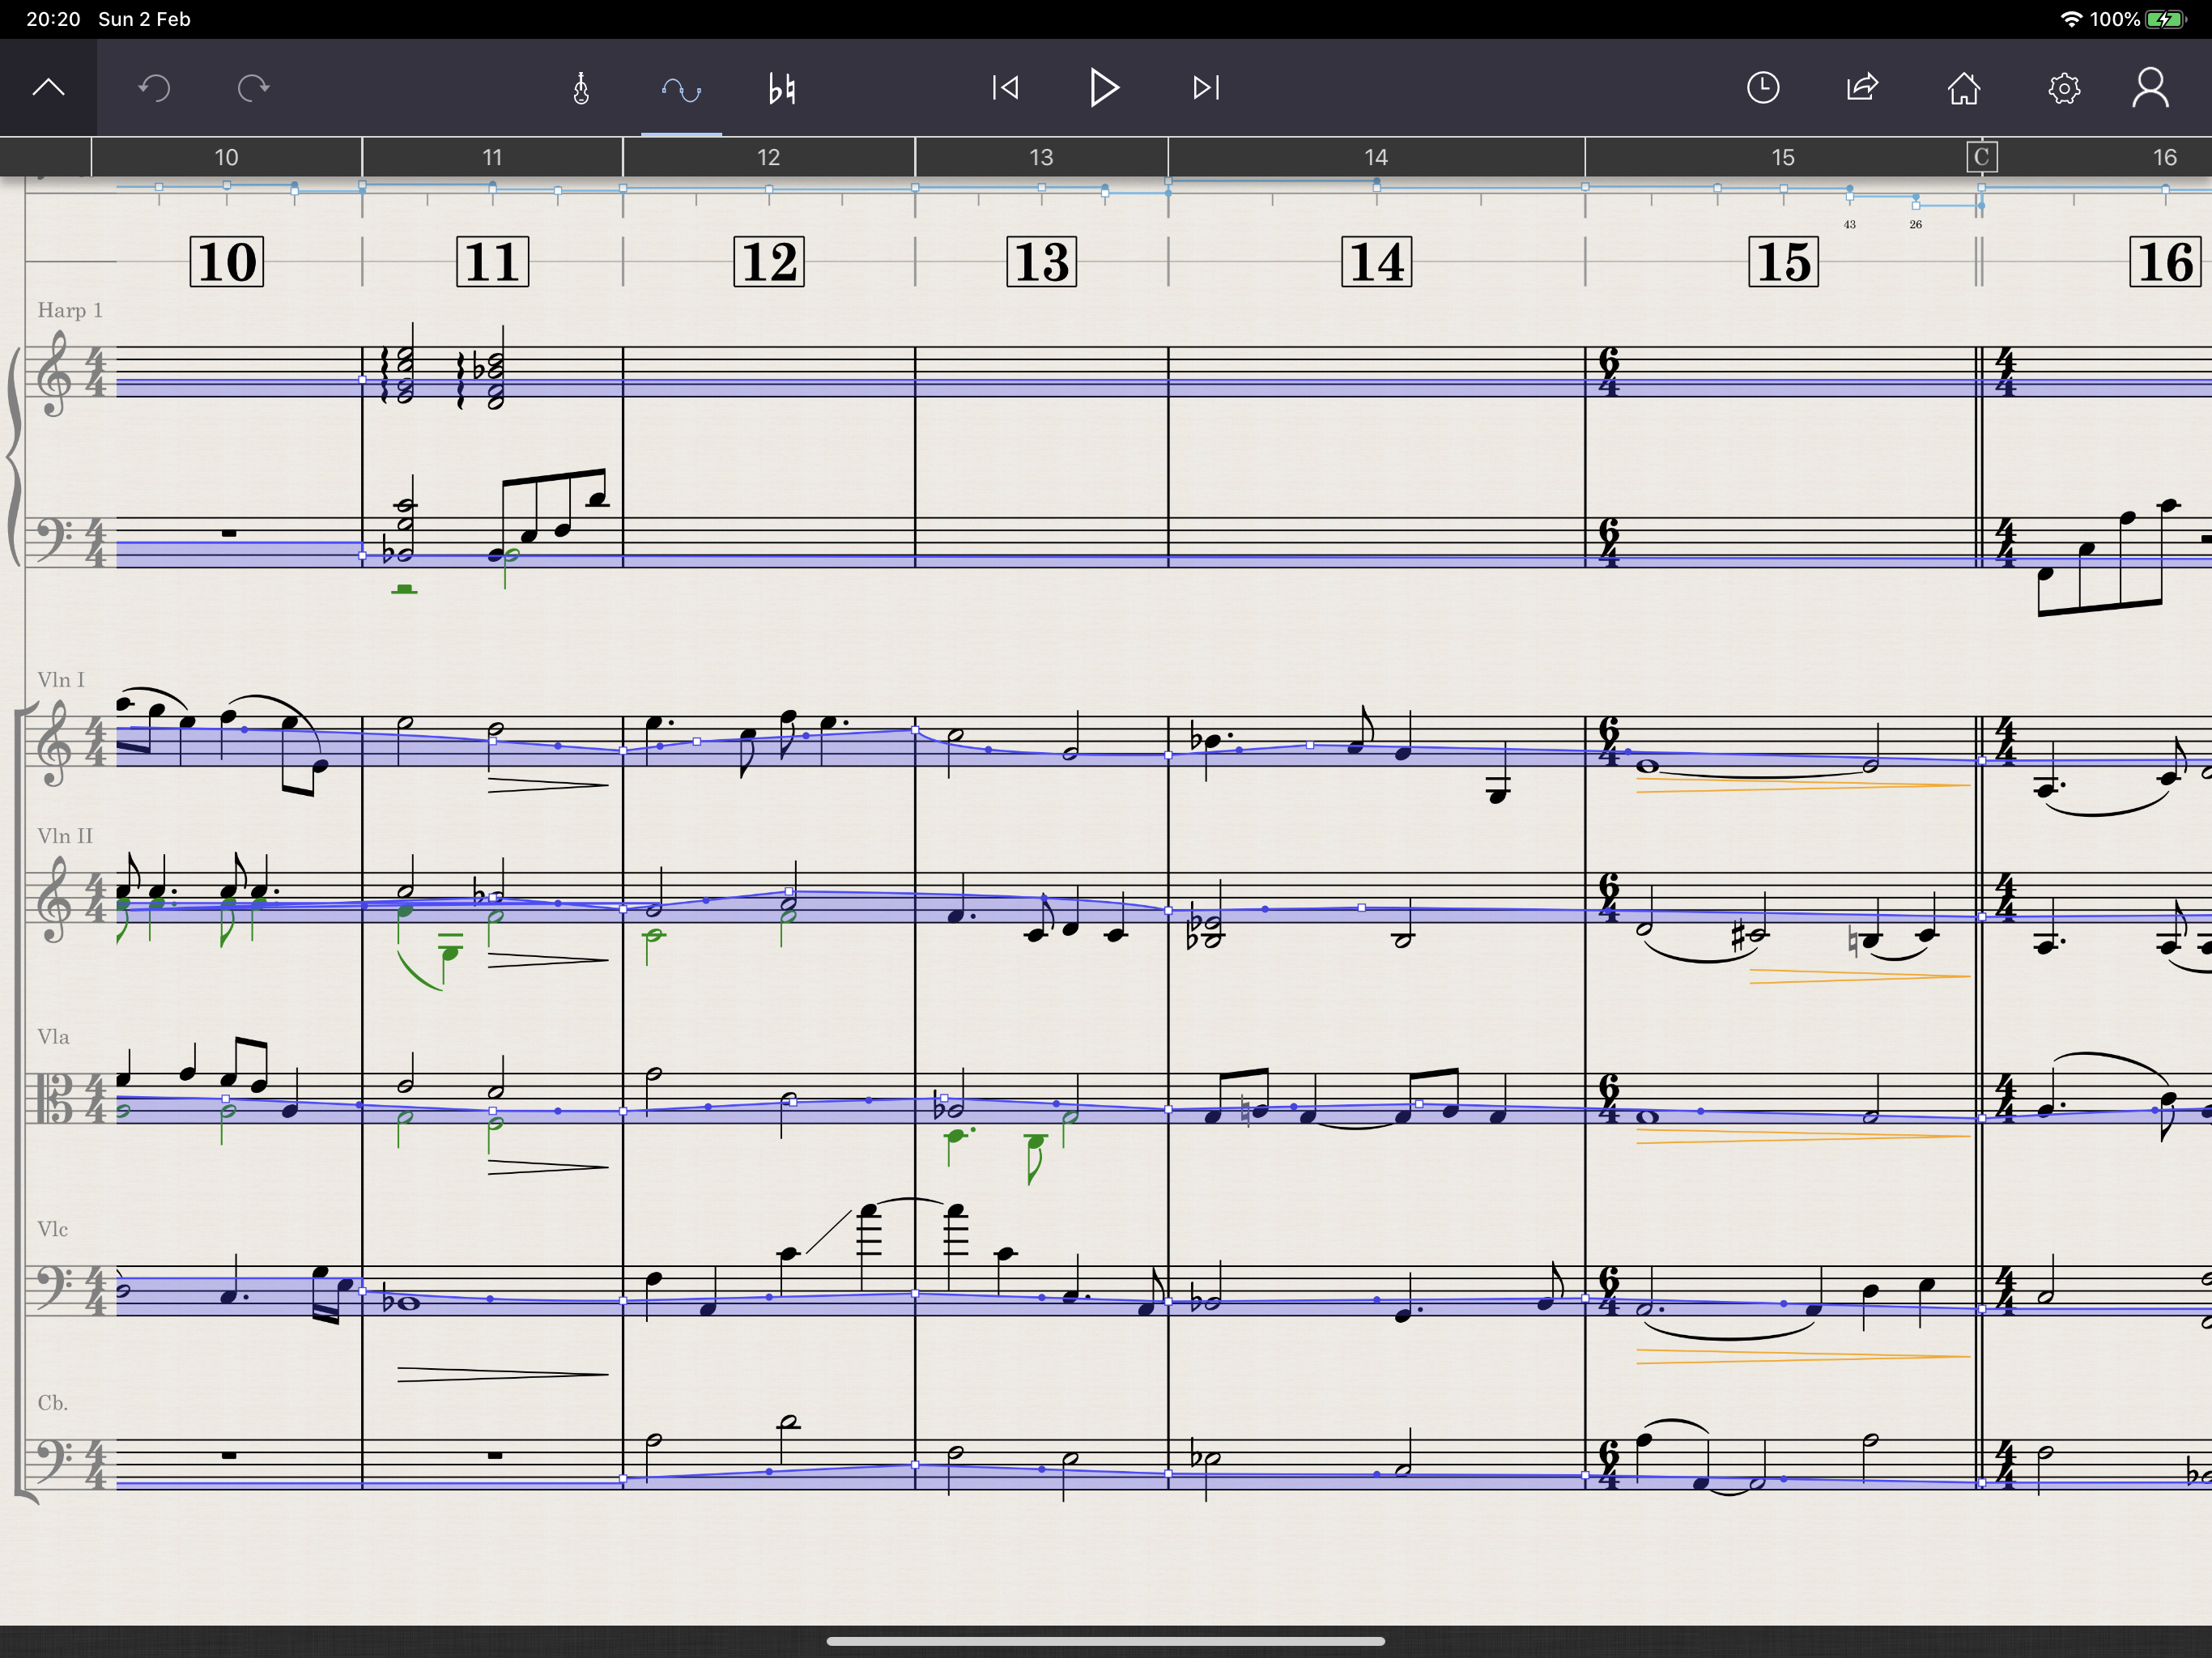
The Automation layer shows an graph like overlay of either expression (playing dynamics), volume, pan and tempo directly on to the music notation itself. It can be very useful to edit these elements, especially for playback purposes, in a more "DAW-like" environment using intuitive graphs and curves.
To reveal the Automation layer, press the Automation button ![]() , which is accessed via the Command bar.
, which is accessed via the Command bar.
The automation layer can show different types of curves:
- Expression
- The Expression curve is the default view, and shows in blue. Expression refers to the real recorded playing dynamics found within the playback sample libraries. This is not the same as volume. For example, if you write a pp crescendoing to a fff you'll hear the musician quite literally play harder as the crescendo increases -- this results in a timbre and character shift, as well as a volume increase. Some of the IAP libraries have well over 5 recorded dynamic layers that you morph smoothly between, by writing traditional dynamics. StaffPad interprets the written dynamics in the score to build a default expression curve, which you can further modify if required.
- Volume
- You can automate the playback volume of the staff, which is the equivalent of moving the volume fader in the Edit Staff control. In fact, you'll see that if you enter curves in this view, the volume slider greys out, since it's now being controlled from the curve.
- Pan
- Like with volume, you can also edit the pan values using this curve.
- Tempo
- This is always visible, regardless of which curve you're viewing. The tempo staff will display a graph - a point-based view of the tempo of the piece, much like you might find in a sequencer or DAW. Regardless of your "detail" setting within the tempo staff's Edit Staff dialog, the automation view will reveal every tempo point on the graph. This requires a Tempo Staff in order to be visible.
To cycle the automation view between these elements, long-touch on a staff and choose View Pan (which displays as a yellow curve) or View Volume (which displays as a green curve).
To make a manual adjustment to an automation curve, simply draw staffs. Anything you draw will supersede the defaults that StaffPad would place based on the written dynamics in your score, or add new points. Your freehand drawing is automatically interpolated to create a simplified curve. Often times, you'll find you probably want to single tap with the pen and drag to move that point around.
You can use the small blue handle which appear in the middle of two points to adjust the curve shape. This way, you can create custom hairpin shapes without having to draw lots of individual points - simply drag the blue handle around.
Overriding dynamics
Any time you override the default dynamics curve that StaffPad has generated for you, the written dynamics will render in orange. You can see the areas that you've manually overridden, because the dynamic markings turn orange when they've been overruled. Once you exit the automation layer, they will return to black.
You can erase any automation point using the eraser.
If you’ve tired of all your changes and want to get back to what StaffPad would have done all along, you can reset the automation globally, or just for that specific instrument. To do so, long-press a bar and choose Reset Automation for Staff. If you want to reset everything, long-press in empty space on the score and choose Reset Current Automation.